2 Girlie hairstyles for Spring.

hey girls,

Today I have two new hairstyles that you can try this spring. Though these hairstyles might be a little cliche but still I find them very easy and doable; and comfortable to wear at the same time. Best it keeps my hair away from the face as well as keeps it flawless and feminine. so let’s get into it

  1. Twisted side tuck-in
  • First brush your hair so that there are no knots and then side part your hair.
  • taking a strand from the lesser side of the partition.
  • now taking another strand from the same parting twist it and blend it with the first strand.
  • similarly repeat this step; pick a strand twist in the previous one and continue it till you reach the end of the ear.
  • tuck it in behind your ear and secure it with some bobby pins.

And there you have it. A nice twisted side tuck-in. It’s great for a casual spring day out and you can easily rock it with a nice floral dress or a flared skirt for your lunch date. ❤ . Now on to the second one.

2. Tuck-in side braid.

  • Again comb through your hair, making sure there are no knots.
  • side part your hair, choosing the part that suits you the best.
  • make sure that the parting is deeper than usual.
  • from the lesser partition choose a strand of hair and start with a normal three strand braid.
  • Normal three strand braid: Divide the chosen strand into three equal parts and place the first part above the second one and the third part above the first one. Similarly place the second part on the third and the third on the first. So on and so forth. (check the diagram below to understand the method properly).

three_string_braid

  • Now take this braided strand, tuck it in with some bobby pins and secure it at the nape of the neck.

So there you have it two easy spring appropriate hairstyles. if you like it and you try it then pls tag me on roposo with #tryitwithT and also on Instagram with the same tag.

hope that you all liked my posts and keep coming back for more till then Look FAB, be FAB & Stay FAB.

EMAIL: tulikazaveri@gmail.com

SOCIAL MEDIA

Twitter: https://twitter.com/tulikazaveri

Facebook Page: https://www.facebook.com/Fa-Beau-Litious-1696050090675263/

Instagram: https://www.instagram.com/fa_beau_litious/

Roposo: https://www.roposo.com/@tulikazaveri_3112

Troubled with Wet Makeup brushes?

Makeup needs maintenance and so does these tools. Tools as in makeup kits, beauty blenders, sponges and most of all these “Brushes”. I’m not a pro makeup artist so obviously i have only one set of my makeup brushes so whenever they are under maintenance i always have to take a makeup free day, not that I don’t like it but come on  ‘a girl needs her glam on to start the day’. Washing those itself is a pain and along with that waiting for it to dry is such a waste of time. Well, then don’t you worry I have got your back here’s my little secret on how I dry my brushes in a unique and a faster way possible.

From last 6 months I had this, as in the green peg-hanger and I only used it for the purposes that it was meant for. BUT this time I discovered a new way to use it and trust me guys it is nothing less than EUREKA!!

IMG_0090

So check it out after I washed my brushes I hung them each on the small clips of this peg-hanger and BAM! I discovered a new way to dry my brushes in much faster way. I washed them in the morning around 11:00 am and mostly by 8ish in the evening they were dry. now let me shed some light on the advantages of this method

  • this will hold your brushes firm and tight. So, no fear of the roll from the table or a flat platform and falling down.
  • being in mid air helps the brushes to dry faster than kept on a flat platform tilted over a towel.
  • clipping them from the farther end gives keeps the brush tilted so the water gravitates downwards.

TIP: try to balance brushes of equal weight on the opposite sides, so that the hanger does not lean  on one side and cause imbalance.

However this method does have a downside to it, you can only dry the thinner brushes like lips or eye brushes. Face brushes are bit of a problem as these brushes are thick in size so they might not easily be adjusted in the grips of these clips and id=f they do then they might cause imbalance. But other than that this method is full proof in my opinion and I am happy to have discovered it and more than happy to share my idea with you all.Buy Peg-hanger here

So guys, if you like what I write and want more of these kind of posts then follow my blog and i assure you to come back with more. If you try it then tag me on Roposo #tryitwithT. Till then Look FAB, Be FAB & Stay FAB.

Chic & Classic

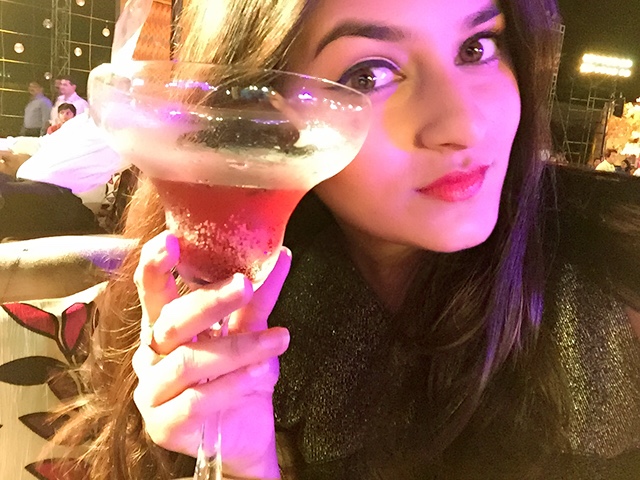
Wedding season in India has almost ended and I had an opportunity to attend a very classy wedding reception. Though I had my outfit figured out for the evening but still was in a dilemma on what look to go for. So then it struck me what better than a classic look that has been in trend since the 60s or may be even before that era. so, i decided to go with the classic and a never dying trend, a Winged liner and a nice bright lip.

Here is what I had in mind before I created this look, i was planning to go for something that wold make me look up beat and not tired or dull as I had been pretty sleepless these past nights. So here i disclose some of the benefits that I got from this look.

  • Winged liner: Instantly makes you look awake and also lifts your eyes.
  • Bold lips: Brings color to the look, pulls the look together and also enhances your skin complexion at some level.
  • Highlighter: reflects back light from the highest points of your face and enhances and beautifies the look to the next level

Products used for the look:

  • Face:

Faces Perfecting Skin Smoother + L’Oreal Paris Infallible 24h Foundation in 200 Golden Sand + Revlon Photoready Skinlights in Peach Light + L’Oreal Mat Magique Pressed Powder in G2 Golden Ivory + E.l.f Studio Contouring Blush and Bronzing Powder in St. Lucia + Milani Baked Blush in 05 Luminoso

  • Eyes

Any gold shimmer eye shadow for the lid + Maybelline Hyper Matte Liquid liner + Maybelline Lash Sensational mascara

  • Lips

Too Faced Melted Liquified Long wear Lipstick in Strawberry

So down here is the final look and if you like it pls share it and try it and tag me on Roposo with #tryitwithT and for more such blogposts pls follow me.

IMG_9940